Why Baking from “Scratch” is Key this Holiday Season

I know that it seems like our weekends are filled with holiday parties with friends, family, or at work.  On top of that there is shopping to do, possible holiday travel to plan, and the list goes on and on.  But, inevitably, there will be some cooking or baking that you need to do either as a guest or a host, and I know with limited time it seems like purchasing pre-made or ready to be made (i.e. pre-made mixes) are the winners choice, but are they really?

Just some food for thought (pun totally intended):

Let’s use a box of yellow cake mix as an example, if you were to purchase a $3.45 box of cake mix (that makes one serving and you still need to purchase eggs and oil to make the cake mix into a cake) you get ingredients of: wheat starch, salt, dextrose, Polyglycerols Esters of Fatty Acids, partially hydrogenated soybean oils, maltodextrin, cellulose, artificial flavors, xanthan gum…..and the list goes on.
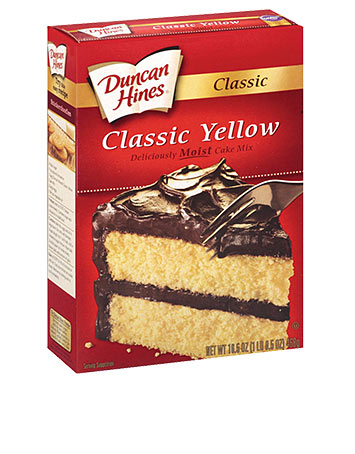
Standard cake mix

Standard cake mix

If we were to purchase our own flour ($2.46), baking powder ($1.89), and sugar ($2.35) our dry goods would cost a total of:  $6.70.  The ingredients you get for flour: enriched unbleached flour, baking soda: sodium bicarbonate and corn starch, sugar: pure sugar cane.

The winner for price?  It seems worth it to buy everything separately….a little more up front, but you can make more cakes (or whatever you choose to do with those extra dry goods). If we used all our dry product, we have at least 4 cakes worth of dry goods, so its about $1.68/cake. But the real winning point for me? The ingredients! When you bake at home, you know what you are putting into your cake, it may not be the fluffiest or most delicious cake anyone has ever had (on the other hand, it totally might be!) but you know that you made it yourself, which people tend to really appreciate, and you know that the ingredients you used were clean and with as few fillers as possible.

cake from scratch

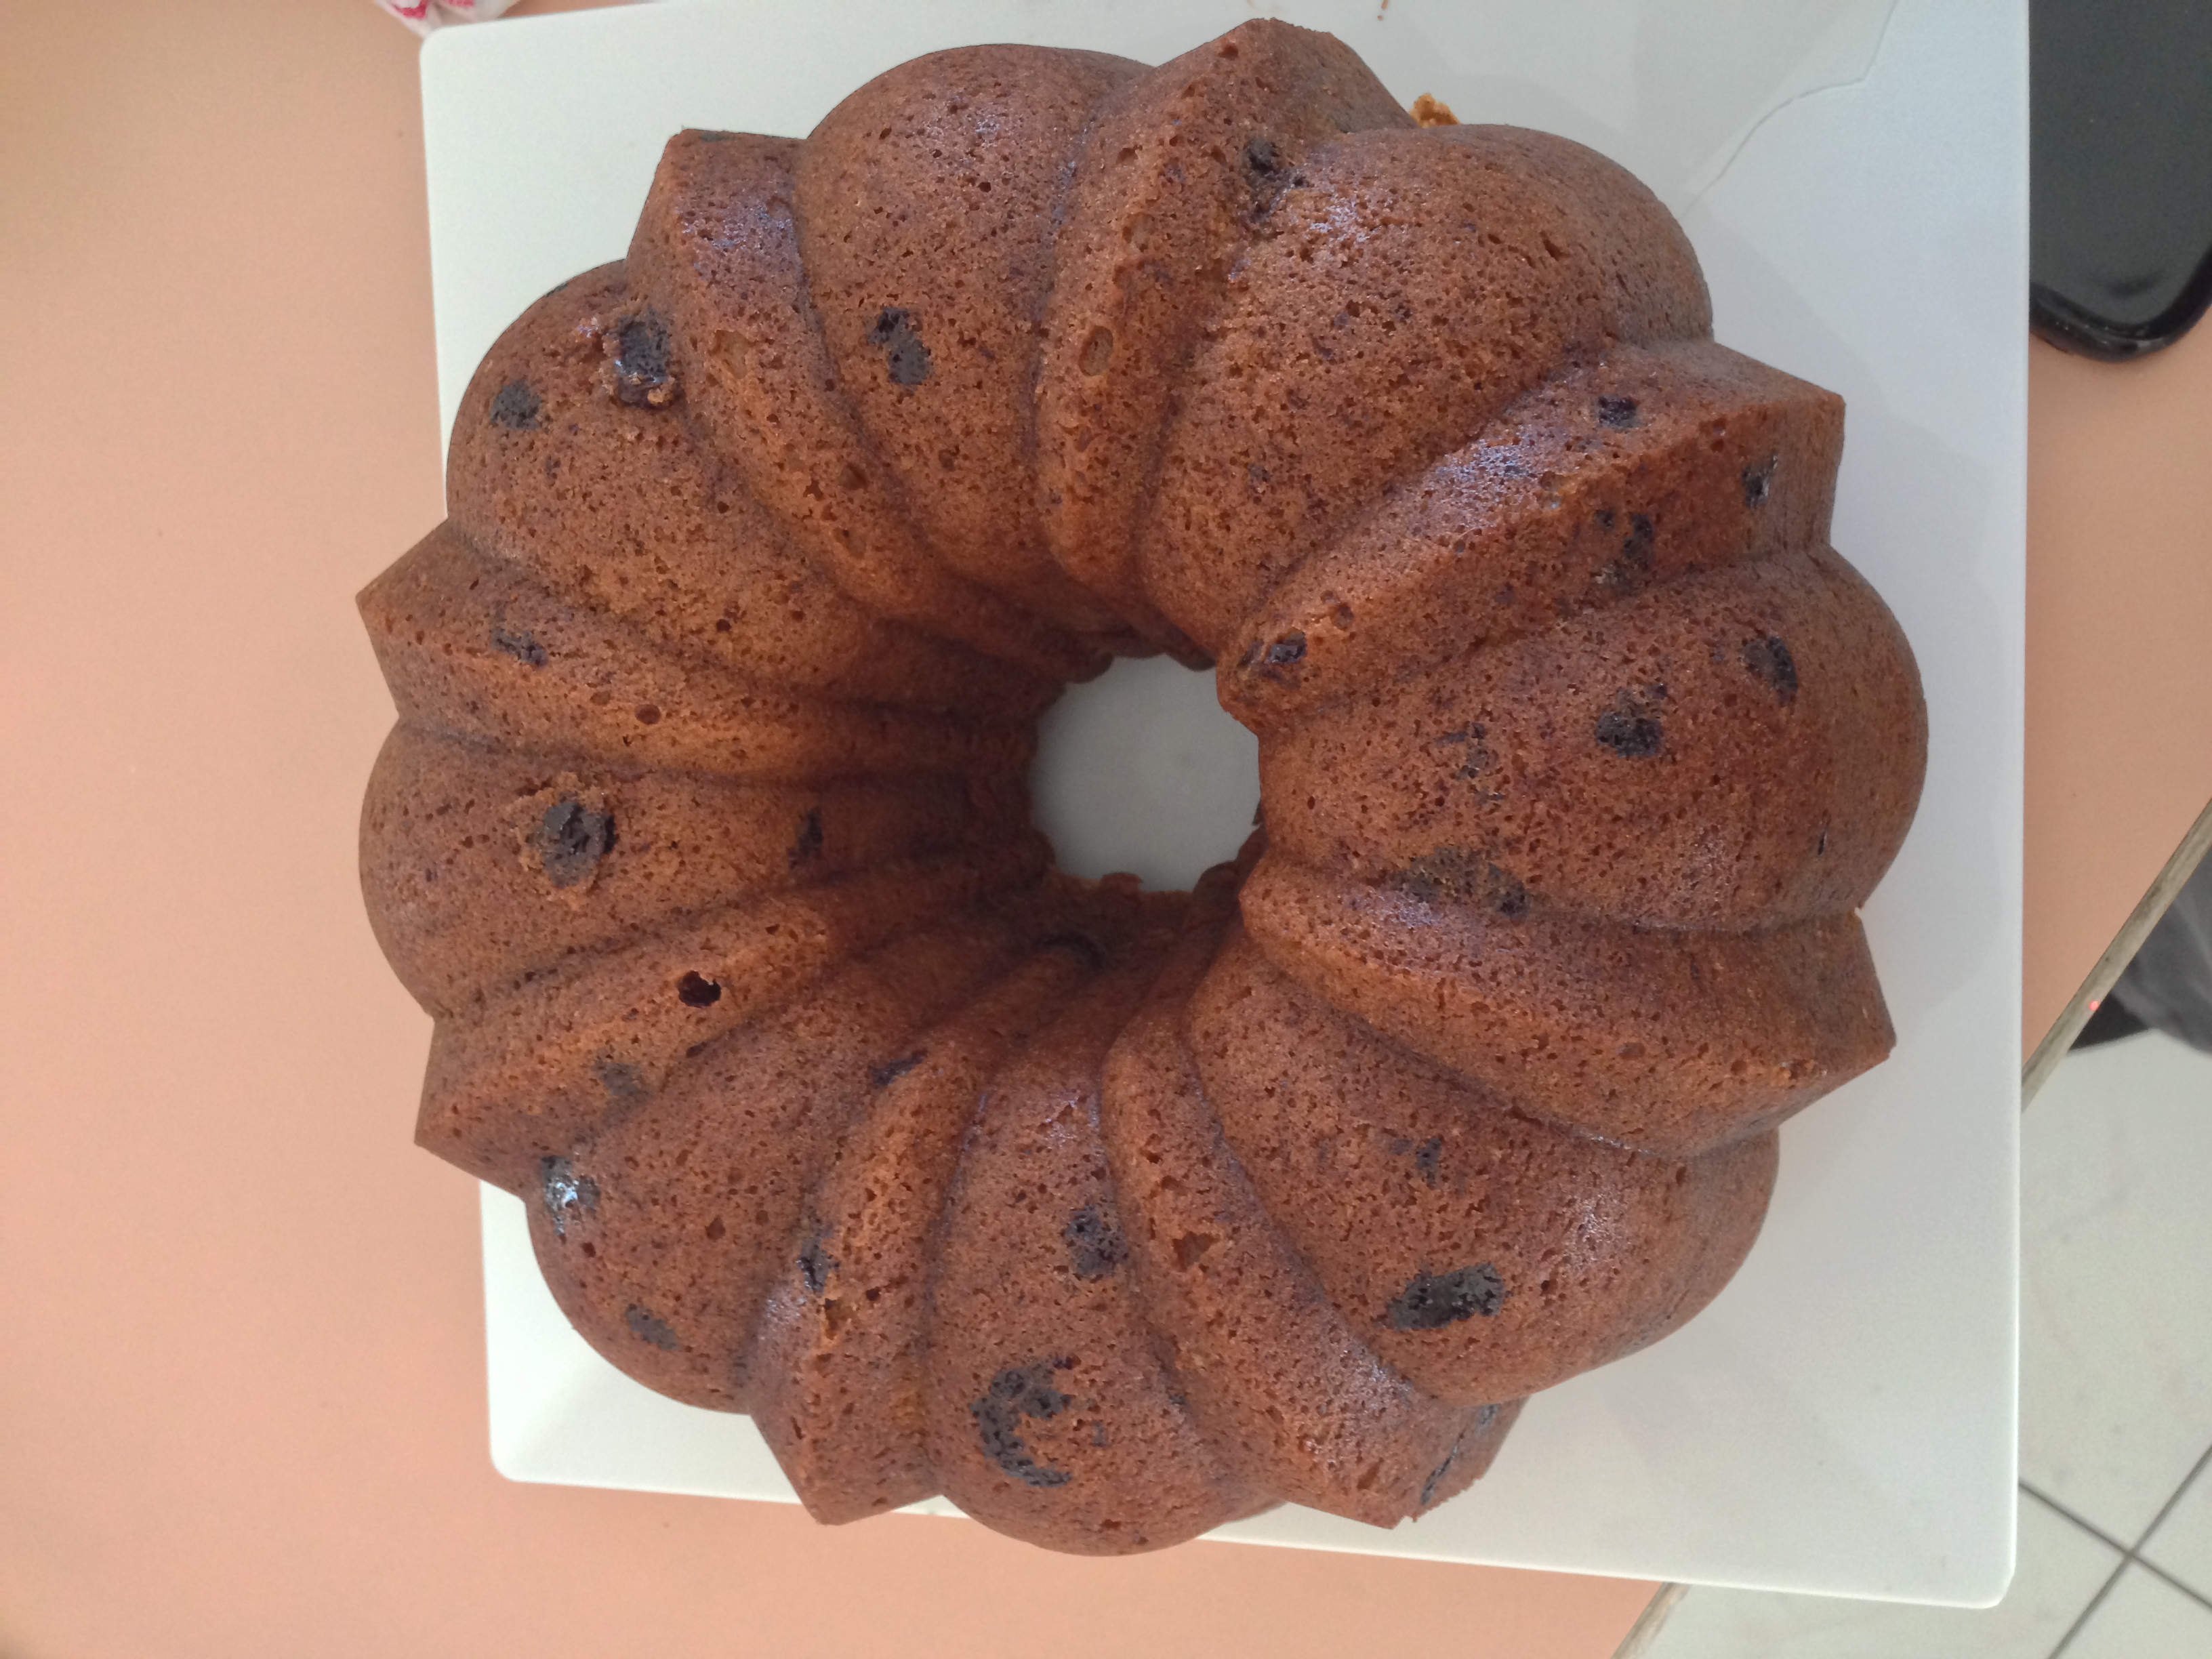
cake from scratch- all organic!

The winner for time?  Per the directions on a yellow cake mix box, it will take 3 minutes of prep time and 28 minutes (approx) of baking time. For a classic yellow cake from scratch, it will take you 15 minutes of prep time and 25 minutes to bake. It’s basically a wash!

Think about it: we all are trying to be healthier, economically savvy, and all in the limited amount of time we have to spare, so why not make something from scratch that you can feel good about eating yourself, feeding your children, and others because you know what went into it. Plus, it takes no more time than baking from a box. I will tell you, I would rather feast on an ugly looking cake made with clean products rather than one filled with preservatives and other man-made things ANY day!

Yours in Good Health

B

December Exercise Challenge: Beat the Holiday Weight Gain!

This exercise challenge was created to beat the holiday bulge, strengthen your core muscles, keep working and improving leg strength, and increase upper body strength.  It is a mixture of exercises that will help us ladies feel good and look good! And every time you want to swear at me for making you do a push up, think about the fact that you are tightening your pecs and helping to keep your upper body nice and toned and perky!!  Join me, get mad at me, and show me up by getting fit and healthy and preventing the holiday weight gain!!

The main exercises we will focus on are:

Squats: Strengthen your lower body and core muscles such as the quadriceps, hamstrings, calf muscles, gluteals, lower abs, and lower back muscles. To perform a squat appropriately, you want to squat straight down (feet hips width apart) as if you are about to sit in a chair (think butt out) as far down as you can go keeping your balance and posture, then stand back up straight.

Planks: Strengthen your upper, middle, and lower core such as the rectus abdominis, transverse abdominis, oblique muscles, pectoralis, serratus, and the quadriceps muscles. You can perform a plank from your knees OR resting on your elbows with your forearms resting on the ground (modified) OR from a high plank position with your hands shoulder width apart, straight body, and on the balls of your feet. Hold steady keeping your back straight and butt in!Plank view 1

Push-Ups: Strengthen and tone abdominals, pectoralis, triceps, and bicep muscles. You can perform a push up from your knees (modified) or from a high plank position (hands shoulder width apart, straight body, and on the balls of your feet), with a straight body, in a controlled motion, lower your body to 6” off the ground, and push back to the top position.

Top (starting and ending) Position

Top (starting and ending) Position


Bottom Position

Bottom Position

Reverse Crunches: strengthen and tone the lower abs, hamstrings, and quadriceps. Perform laying flat on the ground (with hands under your lower back from comfort, if necessary), pull your knees into your abdomen, then push out to straight legs with pointed toes 6” off the ground, and pull them back in.

Oblique Crunches: Strengthen and tone the external oblique abdominal muscles. Perform with your legs at a 45 degree angle raised 6” off the floor and your upper torso also 6-8” off the floor, either with a medicine ball or pretending to hold one, twist to the left with your upper torso and keep your legs in the same position, then go back to center and repeat on the right side. Each side is considered one “crunch”.

Straight Crunches: Strengthen and tone your core abdominal muscles. Perform with your hands interlaced behind your head, not pulling on your head or neck, and with your knees bent and back flat on the floor, pull up using our core abdominal muscles to a 45 degree angle and release, in a controlled fashion.

The Challenge (should you choose to accept it): 

Day 1:  50 Squats & 2 minute Plank

Day 2:  75 Squats & 3 minute Plank

Day 3:  85 Squats & 25 Push-ups

Day 4:  100 Squats & 40 Push-ups

Day 5:  50 Push-ups & 3 minute Plank

Day 6:  4 minute Plank & 100 Squats

Day 7:  Rest Day

Day 8:  5 minute plank

Day 9:  40 Reverse Crunches & 110 Squats

Day 10: 50 Reverse Crunches & 6 minute Plank

Day 11: 60 Reverse Crunches & 50 Push Ups

Day 12: 50 Oblique Crunches & 50 Reverse Crunches

Day 13:  7 minute Plank

Day 14: Rest Day

Day 15: 50 Push Ups & 80 Oblique Crunches

Day 16: 120 Squats & 8 minute Plank

Day 17: 140 Squats & 60 Oblique Crunches & 60 Reverse Crunches

Day 18: 100 Straight Crunches

Day 19: 60 Push Ups & 60 Straight Crunches & 60 Oblique Crunches

Day 20: 8 minute Plank

Day 21: Rest Day

Day 22: 100 Reverse Crunches & 75 Push Ups

Day 23: 160 Squats & 120 Straight Crunches

Day 24: 170 Squats & 80 Oblique Crunches & 80 Reverse Crunches

Day 25: 80 Push Ups & 140 Straight Crunches

Day 26: 200 Squats & 100 Oblique Crunches & 100 Reverse Crunches

Day 27: 9 minute Plank

Day 28: Rest Day

Day 29: 90 Push Ups & 150 Crunches

Day 30: 100 Push Ups & 230 Squats

Day 31: 10 minute Plank

And as always, if you have any medical problems, please speak to your HCP before starting the challenge, and you can always modify the exercises to prevent any injury!

Yours in Good Health

B


The Flu Shot Can Decrease Heart Attack Risk?

I’ve given you all reasons why you should get your flu shot this year (every year, really), but there are some other reasons you should think about getting the flu shot. The Journal of the American Medical Association (JAMA) released a study recently that found people who got the flu shot decreased their risk of having a heart attack, stroke, or sudden cardiac death by almost 1/3rd!

flu_vaccineHow does this happen?

When you get the flu, the body has a huge immune response which causes swelling and inflammation generally throughout the body, which is why you feel body aches, soreness, have headaches, etc. On a vascular level, this inflammation can cause any plaques that may have formed from a build up of fats or other irritants, to become looser unstable, and they can then get into the blood supply, travel, and cause a stroke or heart attack. Also, because you may have lung involvement, it is can be more difficult to breathe, and your oxygen stores might be a little lower than normal, which can put added stress on your heart, which can cause heart failure. By preventing the immune response from the flu, by getting the flu shot, you will be putting your body under less stress and reduce your risk. There was a study of 6,700 people, in which about a third of them had some form of heart disease, and they found that of those people who got the flu vaccination, there was a 36% lower risk of having a cardiac event the following year AND if people had recently had a heart attack or stroke, their rates of having another event were found to be reduced even further.

Bottom Line: 

Any opportunity to reduce your risk of an immune response and major inflammation, will cause less stress to your heart and your vasculature, and decrease your risk of stroke and heart attack. Obviously getting a flu shot will not completely prevent your risk, but I think anything that will help to reduce the risk of stroke or heart attack is worthwhile. The study should be reproduced and be larger to prove its validity, but I truly encourage anyone with heart disease, post heart attack, or stroke to get the flu shot.  And, if you are worried or concerned, speak to your Healthcare Practitioner (HCP) about your risks!

Yours in Good Health

B

Make Sure You are Safe to Drive Home!

The holiday season is upon us, and that means office parties, parties with friends and family, and the opportunity to overindulge and possibly drive. If you live in a large city, it’s not really an issue, you can always leave your car for a few extra hours and catch a cab home, or public transportation (depending on the time). But if you live in the Suburbs or somewhere where the options of getting home are minimal, other than driving or staying over, many people overestimate their ability to drive, and they head on home. That isn’t very safe or smart, but for there is a smarter choice: Personalized Blood Alcohol Content (BAC) testers, also known as Breathalyzers.

I know it seems a little odd, but I recently started thinking about an acquaintance that was court ordered to have a breathalyzer attached to her ignition, so that she can’t start her car without being below the legal limit for driving. Since we have such a huge issue in the United States with drinking and driving, why isn’t that standard on all cars? If you don’t normally drink too much, it’s not an issue, and if you do, it prevents you from a possible arrest (or hurting yourself or others).

What are the options for personal Breathalyzers/BAC tests?

– If you aren’t ready to drop cash and carry around an actual breathalyzer, and if you have a smartphone, you can download an app called “DrinkTracker” which you can create profiles for up to three people (height, weight, gender, etc) that takes into account their bodies and how they might actually metabolize alcohol, you can document how many drinks you have, and at what time, and it estimates your BAC. It’s not 100% accurate, but its a pretty good trick to use on the sly, so you can figure out how many drinks you have, and how you feel….while still being under the legal limit. You can set the BAC that you want  to get to, and it gives you a timer to length of time to get to that level (in other words, when to stop drinking and when you should be able to drive home!) There are quite a few other features, to help you call a cab, and the risks of alcohol ingestion…all for only $1.99.

-If you have an iPhone, iPad, or an iPod there is also a BACtrack BT-M5 Breathalyzer Smartphone Alcohol Tester.  It is a mini Breathalyzer tester that comes with 3 mouthpieces that are reusable, and it connects via bluetooth to your iPhone (or other iProduct) to give you an accurate BAC reading. It also graphs your alcohol intake throughout the night, and estimates when you will be back to below the legal limit. Most importantly, it tells you how the BAC that you currently have effects your body (vision, motor skills, coordination, etc.) so not only might your BAC be above the legal limit, but also shows you why you shouldn’t drive. It’s small enough to be kept in a clutch or a pocket…and it keeps you safe, but it does cost around $149.99.Bactrack_btm5_img3Bactrack_btm5_img4

You can also purchase a real life breathalyzer that law enforcement would use, and have that hooked up to your car, or just carry it around when you go out, for roughly the same price as the BACtrack with smartphone compatibility. I have no interest or backing by either one of these products, I just really happen to think this is a good idea, and it gives people one more reason to think about an alternative to driving themselves when they will be drinking, and it lets you know when you’ve had too much.  It’s a great way to double check yourself, and enter into a safe holiday season!

Yours in Good Health

B

November Exercise Challenge: Beat the Holiday Bulge!

As always, please check with your healthcare provider if you have any specific healthcare needs, and to make sure that you can partake in this challenge. You can always feel free to add or omit weights based upon your personal fitness levels.  And before and after pictures are always a plus so we can see how much we’ve all improved our form!

Since I haven’t posted an exercise challenge in a couple of months, and we have been left to our own devices, I’m going to start it slow, and use some exercises we have done in the past, change-up a few, and then add some new stuff in! Get excited, and get ready to kick up your exercise and get ahead to prevent that dreaded holiday bulge!  This month we will be working on our core abs, hips, and legs, to keep strong and feeling good heading into the holiday season.

Kick lunges work your quadriceps, hamstrings, gluteals, and calves. From and standing position, legs hip width apart, start by lunging backwards with your left leg until your right thigh is parallel with the ground, then rise up and kick your left leg out in front of you (hip height), return to the standing position, then repeat on the other leg.kick lunge

Side leg lifts  work your abductor, AKA hip, muscles (can be made more challenging with a resistance band or ankle weights).  Lay on your side with the leg you are laying on bent at a 45-degree angle, with your upper arm on the ground, bend your elbow and rest your head in your hand.  Keep your top leg straight, and lift it directly up to hip height, then slowly bring it back down to the resting position, switch sides. side leg lift

Back Kicks (or Donkey Kicks) work your core abdominal muscles and your gluteals (can be made more challenging by adding a resistance band or ankle weights). Rest on your hands and knees, slowly kick one leg back until it is straight back until it is hip height, then slowly bring your knee into your chest, then down to resting position, switch sides. Donkey kick

Day 1: Kick Lunges (KL) 10 on each leg and Side Leg Lifts (SLL) 15 on each leg

Day 2: KL 15 on each leg and SLL 20 on each leg

Day 3: KL 20 on each leg and SLL 25 on each leg

Day 4: KL 25 on each leg and SLL 30 on each leg

Day 5: KL 30 on each leg and SLL 40 on each leg

Day 6: KL 35 on each leg and SLL 45 on each leg

Day 7: REST Day!!

Day 8: KL 40 on each leg and SLL 50 on each leg

Day 9: KL 50 on each leg and SLL 60 on each leg

Day 10: KL 60 on each leg and SLL 70 on each leg

Day 11: KL 70 on each leg and SLL 80 on each leg

Day 12: KL 80 on each leg and SLL 90 on each leg

Day 13: KL 90 on each leg and SLL 100 on each leg

Day 14: REST Day!!

Day 15: KL 100 on each leg and Back Kicks (BK) 20 on each leg

Day 16: KL 110 on each leg and BK 20 on each leg

Day 17: KL 120 on each leg and BK 40 on each leg

Day 18: KL 130 on each leg and BK 60 on each leg

Day 19: KL 140 on each leg and BK 80 on each leg

Day 20: KL 150 on each leg and BK 100 on each leg

Day 21: REST Day

Day 22: KL 100 on each leg, BK 20 on each leg, and SLL 50

Day 23: KL 110 on each leg, BK 20 on each leg, and SLL 50

Day 24: KL 120 on each leg, BK 20 on each leg, and SLL 50

Day 25: KL 130 on each leg, BK 20 on each leg, and SLL 50

Day 26: KL 140 on each leg, BK 20 on each leg, and SLL 50

Day 27: KL 150 on each leg, BK 20 on each leg, and SLL 50

Finished! You are looking better, feeling better, have a stronger core and leg muscles, and are ready to continue to dodge that holiday bulge throughout December! Strong core, gluteal, and leg muscles help to stabilize us and make us actually feel stronger.  Keep up the good work!  And join our Facebook Fitness Challenge page to get added tips, ask questions, and cheer each other on!

Yours in Good Health

B

Eat Pure, Feel Pure: Purely Elizabeth

I’ve had a rough week, and when I have a rough week, I tend to look at myself and my life, do my best to fix the source of the problem, or remove it from my life altogether.  I tend to do my best thinking when I am running, hiking, or walking the dogs, times when I can be alone with my thoughts and in nature without anything else to enter my brain. And while some people eat “comfort” foods, go shopping, do something crazy with their appearance,  once I get out of my brain, I re-focus on being healthy.  So, I go to my favorite health food store, stock up on organic foods, and try a new product to introduce into my life. This recent bout of stress brought a new product and a new company into my life that I wanted to share with you all: Purely Elizabeth.

What is Purely Elizabeth?

It is a company that was started by a holistic nutrition counselor, who has always been a healthy eater, but wanted to learn how to make the same baked good that she enjoyed as a child made out of pure, organic, and nutritional ingredients. The products are filled with alternative grains and super foods, and they are free of dairy, sugar, wheat, and gluten, plus they are minimally processed.

I picked up the Pumpkin Fig granola, which is made with organic quinoa (added protein), amaranth (high in b vitamins and amino acids), chia seeds (omega-3 fatty acids, fiber, and antioxidants), and coconut oil (with medium chain fatty acids for fast energy along with antiviral and antimicrobial properties). The oats used are organic, the granola and all of the products are processed the least amount possible, and it is delicious!

Purely Elizabeth is Purely delicious and nutritious!

Purely Elizabeth is Purely delicious and nutritious!

The company bases all products off of the premise that there is a direct connection between what you eat and how you feel. Your body responds positively to the healthy food you put in it to fuel it, which is totally true. You feel better when you eat healthier, drink plenty of fresh water, and exercise.  For one, I’m pretty excited that my recent reinvigoration and refocus on my stress-free life and health has brought me to Purely Elizabeth! Plus, I loved the Pumpkin Fig so much I have picked up some of the other granola flavors (Blueberry Hemp, which I can’t wait to try) and I have also ordered some of their oatmeal flavors!

Check out the website to see what local stores sell their products, and learn more about this amazing company that gives back to the community to teach about nutrition and healthy lifestyles, and supports non-profits that support the education of nutrition! So by purchasing Purely Elizabeth, you’re doing something good for your body AND for society.

Yours in Good Health

B

The Ultimate Intruder: Head Lice

Head lice invade over one million scalps per year, most of which tend to be kindergarten and early school age children, and quickly invade the rest of the family! There are many myths out there, like a lice infestation means you are unhygienic, but that actually isn’t true.  The wingless, tiny parasites that live on your scalp and the blood source to your scalp, actually prefer a cleaner home, and is spread by close contact and sharing clothes (hats) and other personal items (towels, brushes, etc.) The official name is pediculosis capitis, and there are some ways to prevent your little ones from bringing home this infection, and what to do when they do bring it home!

The Symptoms of Lice:

Usually an intensely itchy scalp is the first sign of lice, but you also might notice red itchy bumps on your head and neck. When the lice bite into your scalp to get the blood to feed off of, it can cause a small allergic reaction, which leads to the bumps and itchiness.  Also, when the lice lay eggs, people notice a increase in “dandruff” which is usually little yellow lice eggs that line the hair shafts. Adult lice tend to cause more itching around the back of the ears and neckline. And although you might see the eggs on the hair shafts,  that is not enough to truly diagnose the infection, but if you do have a lice infection, the way to truly diagnose is to visualize lice moving on the scalp.

What are some Treatments?

If you notice any of these symptoms, you should try an Over-the-Counter (OTC) treatment shampoo, to try and kill off the parasites early. The OTC shampoos either have pyrethrin (like Rid) or permethrin (like Nix). If that does not work, you can call your Healthcare Practitioner (HCP) to prescribe a stronger treatment.

Malathion (Ovide) is a medication that should only be used on people older than 6 years old, rubbed into the hair and scalp, but it is highly flammable! Benzyl alcohol lotion, is also applied the same way as the malathion, and is a newer treatment that cannot be used on those less than 6 months old, and even in adults, the FDA does warn of risk of seizures and other pretty serious side effects. As with any treatment, make sure that your HCP is aware if you are pregnant or breastfeeding, as some of the drugs are absorbed into the skin and can be excreted in breast milk.

If you are worried about absorbing the chemicals, you can also just wet your hair, and comb it, using a fine tooth comb, every 3 days for 3 to four weeks, which allows you to remove the lice and eggs, and this is the best method with really young children. It obviously takes longer to get rid of the infestation, but it does so without chemicals, and could be an option for those wary of chemical use. As lice can live for up to around two days without a food source, and nits (the eggs) need to live at scalp temperature, combing the bugs and lice out can help to stop the parasites from further breeding.

Also, this won’t work for girls, but young boys, you can cut their hair short (as long as they aren’t opposed) to help remove the lice and nits!  One of my good friends (who happens to also be an RN) JUST had this lovely experience, and was nice enough to send along the pics of their experience:

with hair.....

with hair…..


without hair...and getting the combing treatment!

without hair…and getting the combing treatment!

How do I prevent the spread in my home?

Heat and lack of food sources help to end the infestation in your home: 

-Wash all clothes, sheets, towels, etc in hot water (at least 130F/54.4C) and dry on high for a minimum of 20 minutes.

-Brushes, combs, hair care products should be soaked in very hot water for at least 10 minutes (make sure to use insulated gloves to protect yourself from burns!)

-All comforters, pillows, bedding, and other items that are tough to wash, should be placed in air tight bags for 3-4 days to cut off air supply to the parasites and kill them and the nits.

-Vacuum all rugs and couches to remove any possible lice or nits

Also, remind your children not to share hats or scarves, helmets (if playing sports), or any brushes or other hair care products. This can’t always be avoided, and kids will be kids, but it is a good reminder to help and prevent an infection. And remember to tell them, if they do get lice, that it doesn’t mean they are unclean or dirty, but it is something that happens to many people, and with some quick treatments, a lot of laundry, and some parental strife, all will be back to normal soon!  Plus, tell your child’s school nurse, coaches, etc to make sure that the infection isn’t spread and other parents know to look for symptoms.

Yours in Good Health

B


A Divorcee’s Guide to Online Dating- Bloom!

Some tips for those new to the dating world: it is truly a whole new world with online dating.  It can be scary, fun, and you will have some of the best and worst experiences of your life!

Check out Nurse Bridgid featured on Bloom!Bloom Flower


Yours in Good Health

B

Get your Sprout on!

Bean sprouts have all sorts of benefits as a source of food, and a food you can really feel good about eating! There are all sorts of sprouts too: mung, sunflower, lentil, alfalfa, etc. which are all equally healthy for you, and really should be a mainstay of your diet. I try to get them into my diet as much as possible, and eat full sprout salads a few times a week because of their amino acids, proteins, vitamins and minerals.

My favorite mix of Bean Sprouts

My favorite mix of Bean Sprouts

Why are Sprouts so good for you?

They are low in calories, around 31 calories in 1 whole cup of raw sprouted beans (one serving size), and very low in fat, almost 0.2g.  With 3.2g of protein, which is 11% of your recommended daily amount (RDA), available and around 2g of fiber (8% RDA),they have a decent potassium content (4% RDA) , while being low in sodium, and contain 22% of your RDA of Vitamin C. These sprouts are truly a dieters dream; they fill you up with their fiber content, and you stay full longer because they have protein in them to keep you satiated.

Putting a few different types of bean sprouts together in a salad is awesome because you can get such a great mix of flavors, and power packed with nutrition. They can have more crunch, if you want to eat them raw, or softer if you want to steam or cook them, and you can also mix raw and cooked together, along with adding some other veggies to mix up flavors and add even more nutrition.  My favorites? A mix of alfalfa, sunflower, garbanzos, red lentils, green lentils, radish, peas, and azuki. I love the mixture of flavors, and I eat them sprouted raw!

They are versatile, filled with flavor, and packed with nutrition, all while low on fat and calories, and I see no downside to adding more to your diet….and I bet you will see some benefits and feel better!

Yours in Good Health

B


By popular demand: Fresh Pumpkin Cookies

20130924-053425.jpg

After making these pumpkin cookies for a friend that really digs pumpkin, and wanting to make a healthier version of pumpkin chocolate chip cookies, I think I have pretty much perfected the recipe.  I do use coconut palm sugar as a sweetener, and chocolate chips, but I buy the least processed I can find! Since so many have requested the recipe, here it is for all to enjoy:

Nurse Bridgid’s pumpkin chocolate chip cookies!

2 cups freshly roasted pumpkin

1 cup coconut palm sugar ( I use coconut palm sugar but I’ve also made these with raw sugar and decreased to 3/4 cup)

1/2 cup vegetable oil (I use pumpkin, flaxseed, chia, or grape seed oil instead of traditional vegetable oil)

1 egg

2 cups flour (I make my own oat flour as a base, but I have made them with white flour and wheat flour too)

2 teaspoons baking powder

4 teaspoons ground cinnamon

4 teaspoons allspice

4 teaspoons ground ginger

1/2 teaspoon salt

1 teaspoon baking soda

1 teaspoon milk

1 tablespoon vanilla extract (pure vanilla)

2 cups chocolate chips

1. Combine pumpkin, sugar, vegetable oil, and egg with a mixer.

2. In a separate bowl, stir together flour, baking powder, ground cinnamon/allspice/ginger, and salt. Dissolve the baking soda with the milk and stir in.

3. Add flour mixture to pumpkin mixture and mix well.

4. Add vanilla and chocolate chips (you could probably add nuts too!)

5. Drop by spoonful on a parchment paper covered cookie sheet and bake at 350 degrees F for approximately 12 minutes or until lightly brown.

*They don’t really firm up like “regular” cookies due to their pumpkin base and because they are made with pumpkin, I refrigerate them instead of leaving them out and just reheat for a few minutes before serving….unless they are fresh out of the oven!

Give them a try and let me know what you think, and enjoy those fresh fall pumpkins!

Yours in Good Health

B